


Table of Contents
- Why Preventative Maintenance Matters for Welding Equipment
- Welding Machine Preventative Maintenance Checklist
- Cleaning the Machine Interior and Removing Spatter Buildup
- Welding Cable Maintenance Best Practices
- Inspecting Electrical Connections and Ground Clamps
- OSHA Welding Equipment Safety Requirements and Lockout Procedures
- Managing Duty Cycle and Cooling System Performance
- Storage, Environmental Protection, and Consumable Replacement
- Frequently Asked Questions
Last Updated: September 3, 2026
Why Preventative Maintenance Matters for Welding Equipment
Preventative maintenance is the difference between reliable job-site performance and costly downtime. Welding machines endure intense electrical loads, thermal stress, and environmental exposure daily. Without consistent maintenance, components degrade silently until failure becomes inevitable, corroded ground clamps, frayed cables, or dust-clogged circuit boards compound into breakdowns that could have been prevented. Regular inspection and cleaning catch problems before they become emergencies, extending equipment longevity, maintaining weld quality, and protecting your bottom line.
Preventative maintenance transforms welding equipment from a liability into a dependable asset. Consistent inspection and cleaning prevent costly failures and extend equipment life by years.
Welding Machine Preventative Maintenance Checklist
A solid preventative maintenance checklist keeps your team accountable and ensures nothing gets overlooked. Separate tasks by frequency: daily inspections catch acute problems, while weekly and monthly checks address deeper issues.
Daily Inspection Tasks
Daily inspections take 10-15 minutes per machine and catch problems while they’re manageable.
Visual inspection of the power unit: Check for visible damage, loose connections, or signs of overheating. Use compressed air to clear dust from the cooling system intake.
Check cable and connector integrity: Examine welding cables for cuts, burns, or exposed insulation. Run your hand along the length; fraying or soft spots indicate internal wire damage. Verify all connectors seat firmly with no visible corrosion.
Inspect the MIG gun and electrode holder: Look for spatter buildup on the contact tip and nozzle. Wipe the contact tip with a clean cloth or use a contact tip cleaner if buildup is heavy.
Verify ground clamp connection: The ground clamp must clamp firmly to the workpiece with no wobbling.
Listen for unusual sounds: Run the machine briefly and listen for grinding, buzzing, or rattling.
Weekly and Monthly Checks
Weekly: Clean the machine exterior and cooling fins. Use compressed air to blow dust and debris from cooling fins, vents, and the exterior casing.
Weekly: Inspect wire feed mechanism. Check that the wire spool rotates smoothly and the feed rollers aren’t worn flat.
Monthly: Deep clean the machine interior. Open access panels (following safety lockout procedures) and use compressed air to remove accumulated dust from circuit boards, transformers, and cooling passages. Never use a vacuum; static discharge can damage sensitive components.
Monthly: Check all electrical connections. Inspect internal connections for corrosion, loose terminals, or burn marks. Clean with electrical contact cleaner and reseat firmly.
Monthly: Test duty cycle performance. Run a test weld at your machine’s rated duty cycle and monitor temperature.
| Task | Frequency | Time Required | Priority |
|---|---|---|---|
| Visual power unit inspection | Daily | 5 min | Critical |
| Cable and connector check | Daily | 5 min | Critical |
| MIG gun/electrode holder inspection | Daily | 3 min | Critical |
| Ground clamp verification | Daily | 2 min | Critical |
| Exterior cleaning | Weekly | 15 min | High |
| Wire feed mechanism check | Weekly | 10 min | High |
| Interior deep clean | Monthly | 30 min | High |
| Electrical connection inspection | Monthly | 20 min | High |
| Duty cycle performance test | Monthly | 15 min | High |
Set maintenance tasks to recurring calendar reminders on your shop’s scheduling system. Assign specific team members to specific tasks so accountability is clear. Rotate assignments quarterly to build maintenance knowledge across your entire team.
Cleaning the Machine Interior and Removing Spatter Buildup
Spatter and dust accumulation degrade welding machine performance. Spatter sticks to the contact tip, nozzle, and gas diffuser, restricting gas flow and creating weld defects. Dust accumulates on circuit boards and cooling passages, degrading thermal performance and increasing failure risk.
Interior cleaning should happen monthly for high-volume shops and quarterly for lighter-duty operations. Power down the machine and follow OSHA lockout procedures: disconnect power, tag the disconnect switch, and prevent accidental startup.
For the MIG gun: Remove the contact tip and nozzle. Soak them in contact tip cleaner or acetone for 15-20 minutes to dissolve spatter. Use a small brass brush to gently scrub away remaining buildup. Never use steel brushes; you’ll damage precision surfaces. Rinse thoroughly and air dry before reinstalling.
For the electrode holder: Wipe the jaw surfaces with a clean cloth. If spatter has bonded to the jaw, use contact tip cleaner on a cloth and gently rub until clean.
For internal components: Open access panels and use compressed air at moderate pressure to blow dust from circuit boards, transformers, and cooling passages. Work systematically from top to bottom, paying special attention to cooling fins and fan intake areas.
After cleaning, allow the machine to sit for 15 minutes before powering it back on.
Welding Cable Maintenance Best Practices
Welding cables carry high amperage and endure constant flexing, heat exposure, and environmental stress. Proper cable maintenance prevents most failures before they occur.
Inspect cables daily for visible damage: Look for cuts, burns, kinks, or crushed sections in the outer insulation. Run your hand along the entire cable length; you can often feel internal damage before it’s visible. If you feel soft spots or unusual flexibility, that cable has internal wire breakage and must be replaced.
Check cable routing and storage: Cables should never be coiled tightly or kinked sharply. Coil cables loosely in large loops or use a cable reel. Never run cables across sharp edges or under heavy equipment.
Clean cable connections monthly: Corroded or dirty connections create resistance and generate heat. Use electrical contact cleaner and a small brush to clean connector pins and sockets. Dry thoroughly before reconnecting. If corrosion is heavy, apply a thin coat of dielectric grease to prevent moisture from reaching the connection.
Monitor cable temperature during operation: Feel the cable during welding; it should be warm but not hot to the touch. If a cable becomes too hot, it indicates excessive resistance from a loose connection or internal damage. Stop welding immediately and investigate.
Replace cables on a schedule: Most high-quality welding cables have a service life of 3-5 years with regular maintenance. Track installation dates and plan replacement proactively.
Inspecting Electrical Connections and Ground Clamps
Electrical connections and ground clamps are where most welding machine problems originate. Corroded connections, loose terminals, and poor ground clamps create resistance that degrades weld quality and damages equipment.
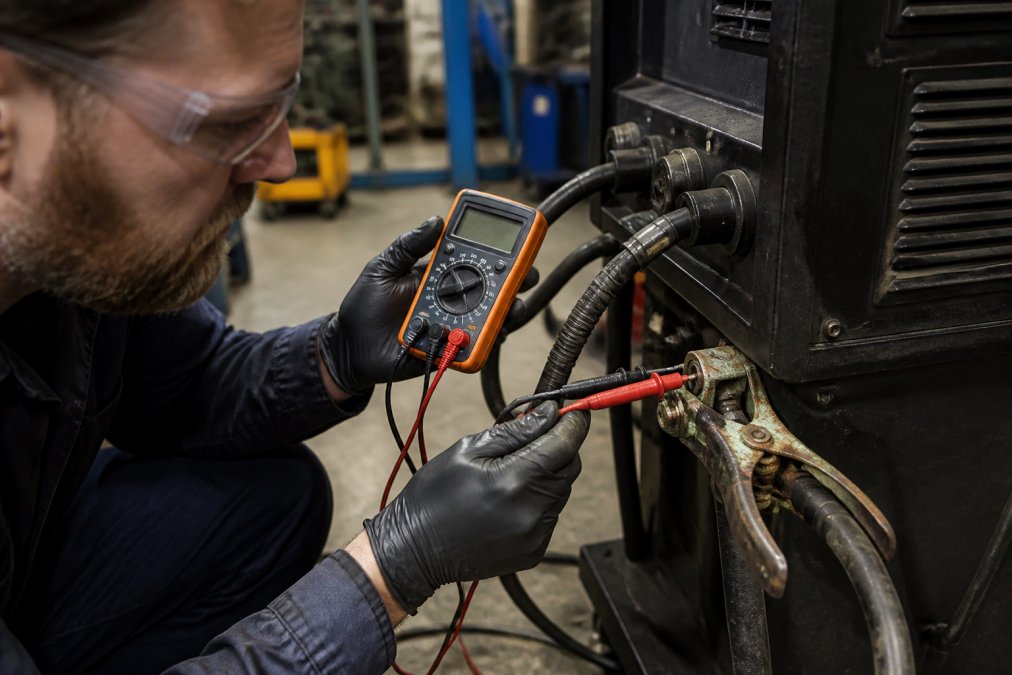
Check ground clamp clamping force: The ground clamp must clamp firmly to the workpiece with no movement. A loose clamp creates a high-resistance connection that causes voltage drop and inconsistent arc. Test the clamp by trying to wiggle it; if it moves, tighten the clamping screw. If tightening doesn’t eliminate wobble, the clamp jaw may be worn and requires replacement.
Inspect ground clamp contact surfaces: Look at the jaw surfaces where the clamp grips the workpiece. If you see corrosion, discoloration, or pitting, clean the surfaces with a wire brush or contact cleaner. After cleaning, test the clamp connection with a multimeter set to resistance mode; resistance should be near zero ohms.
Subscribe to our newsletter! →
Examine all machine terminals and connections: Look inside the machine’s electrical compartment for loose terminals, corroded connections, or burn marks. Tighten any loose terminals and clean corroded connections with electrical contact cleaner and a small brush. Apply a thin coat of dielectric grease before reconnecting.
Test main power connections: With the machine off and locked out, use a multimeter to test continuity of main power connections. Resistance should be near zero.
Never work on electrical connections while the machine is powered. Always disconnect power, lock out the disconnect switch, and tag it to prevent accidental startup. Welding machines operate at high voltage and can cause serious injury or death. When in doubt, contact a qualified electrician.
OSHA Welding Equipment Safety Requirements and Lockout Procedures
Welding equipment maintenance creates specific safety hazards that OSHA regulations address directly. Compliance protects your team from serious injury.
OSHA requires that welding equipment be maintained in safe operating condition and inspected regularly. Facilities must establish a maintenance program that documents inspections and repairs.
Lockout/Tagout (LOTO) procedures are mandatory when performing maintenance on welding equipment. Before opening access panels or working on electrical components:
- Disconnect the machine from power at the main disconnect switch
- Lock the disconnect switch in the OFF position using a padlock
- Attach a tag to the padlock stating the reason for lockout and the date
- Test that the machine is de-energized using a multimeter before beginning work
- Keep the key to the padlock in your possession
- Remove the lock and tag only after maintenance is complete and you’ve verified all safety systems are functional
Never bypass or defeat lockout procedures. A team member could accidentally power on the machine while you’re working inside, causing electrocution or crush injuries.
Grounding requirements: OSHA requires that welding equipment be properly grounded to prevent electrical hazards. The ground clamp must provide a solid electrical connection to the workpiece. Never weld without a properly connected ground clamp.
Cable safety: OSHA requires that welding cables be inspected regularly and replaced when damaged. Establish a cable inspection routine and replace cables that show cuts, burns, or insulation damage.
Documentation: Maintain records of all maintenance performed, including inspection dates, work completed, and any parts replaced. This documentation demonstrates compliance with OSHA requirements and provides a history of equipment condition.
Managing Duty Cycle and Cooling System Performance
Duty cycle is the percentage of time a welding machine can operate continuously at rated output without thermal shutdown. Most industrial welding machines are rated at 60% duty cycle at maximum output. Understanding and managing duty cycle prevents thermal shutdowns and extends equipment life.
Monitor machine temperature during operation: Feel the machine’s exterior casing periodically during welding. It should be warm but not too hot to touch comfortably. If the machine becomes uncomfortably hot or triggers thermal shutdown before expected, cooling system performance has degraded.
Maintain cooling system airflow: The cooling system draws air through intake vents and expels it through exhaust vents. Blocked vents prevent proper cooling. Monthly, use compressed air to blow dust and debris from all intake and exhaust areas.
Verify fan operation: With the machine powered on, listen for the cooling fan during and shortly after welding. If the fan doesn’t run or runs intermittently, the fan motor may be failing.
Manage ambient temperature: Welding machines cool by drawing ambient air through the casing. If your shop is extremely hot, the machine struggles to dissipate heat and thermal shutdown occurs more frequently. Improve shop ventilation or schedule heavy welding during cooler parts of the day.
Track thermal shutdown events: If your machine triggers thermal shutdown regularly, document when shutdowns occur and under what conditions. Frequent shutdowns indicate cooling system failure, excessive ambient temperature, or a machine being pushed beyond its rated capacity.
Storage, Environmental Protection, and Consumable Replacement
How you store welding equipment when not in use dramatically affects its longevity. Environmental exposure, moisture, temperature extremes, dust, and corrosive atmospheres accelerate component degradation.
Storage environment: Store welding equipment indoors in a climate-controlled space when possible. If indoor storage isn’t available, use a weatherproof cover or enclosure. Protect the machine from direct sunlight, rain, and snow. Moisture is the primary enemy; it corrodes electrical connections, causes rust, and damages circuit boards.
Temperature stability: Extreme temperature swings cause condensation inside the machine when it’s powered on after cold storage. Allow the machine to reach ambient temperature before powering it on.
Dust and debris protection: Cover the machine when not in use to prevent dust accumulation. Use a breathable cover that allows moisture to escape but keeps dust out.
Consumable replacement schedules: Consumables include contact tips, nozzles, liners, gas diffusers, and electrode holders. Track consumable usage and establish replacement intervals:
- Contact tips: Replace when spatter buildup can’t be cleaned away or when the tip becomes pitted.
- Nozzles: Replace when corroded or when gas flow becomes restricted.
- Liners: Replace when wire feed becomes inconsistent.
- Gas diffusers: Replace when corroded or when gas coverage becomes inconsistent.
- Electrode holders: Replace when jaw surfaces become pitted or the trigger mechanism wears out.
Stock common consumables so you’re never caught without replacements mid-job. Establish a consumable tracking system, either paper-based or digital, that logs usage and replacement dates.
Maintaining industrial welding equipment requires consistency and attention to detail, but the payoff is substantial. Equipment that receives regular maintenance performs reliably, produces consistent weld quality, and lasts years longer than neglected machines.
KGM Equipment supports your maintenance efforts with high-quality replacement parts, consumables, and expert guidance on keeping your welding systems running at peak performance. Our team understands the operational demands of auto body shops and industrial facilities. Reach out to our customer support team for maintenance advice, parts recommendations, or equipment questions. Subscribe to our newsletter for maintenance tips, product updates, and industry insights delivered to your inbox.
Frequently Asked Questions
How often should industrial welding equipment be serviced?
Daily inspections are essential for safe operation, while comprehensive servicing depends on usage intensity. Light-duty equipment may need monthly checks, whereas high-volume production machines require weekly inspections and monthly deep maintenance. Consult your equipment manual for specific intervals, and increase frequency if you notice performance changes. Regular servicing prevents costly downtime and extends equipment lifespan significantly.
What are the most critical components to inspect on a MIG welder?
Prioritize inspecting the MIG gun, contact tip, nozzle, wire feed system, ground clamp, and electrical connections. Check for spatter buildup on the nozzle and contact tip, which reduces efficiency. Examine cables for fraying or insulation damage. Verify the ground clamp makes solid contact with the workpiece. Test the wire feed mechanism for smooth operation. These components directly affect weld quality and operator safety.
How do you identify signs of wear in industrial welding cables?
Inspect cables regularly for visible fraying, cuts, or exposed copper strands. Look for discoloration, cracking in the outer insulation, or areas where the cable feels stiff or brittle. Check connections at both ends for corrosion or loose fittings. Test cables with a multimeter if you suspect internal damage. Replace cables immediately if insulation is compromised, as damaged cables create electrical hazards and reduce welding performance.
What safety protocols should be followed during welding equipment maintenance?
Always disconnect power before servicing, following OSHA lockout/tagout procedures. Allow the machine to cool completely before touching internal components. Wear appropriate PPE, including gloves and safety glasses. Never work alone on complex repairs. Keep the work area well-ventilated and free of flammable materials. Document all maintenance in a log for compliance and troubleshooting. When in doubt, contact qualified technical support rather than attempting advanced repairs yourself.
This article was written using GrandRanker

