


Rising costs for professional car body repair in 2025 are leaving many car owners searching for affordable solutions. Even small dents or scratches can hurt your car’s look and value, making it crucial to know how to tackle repairs yourself.
This guide is your trusted, up-to-date resource for mastering car body repair at home. Thanks to new tools and technology, DIY fixes are easier than ever. You’ll gain cost savings, satisfaction, and a like-new finish.
Ready to take control? Follow this guide to learn seven essential hacks, from paintless dent removal to paint protection, and keep your car looking its best.
Understanding Modern Car Body Repair Challenges in 2025
Car body repair is undergoing a rapid transformation in 2025, driven by changes in both vehicle materials and cutting-edge technology. For modern car owners, understanding these challenges is the first step to making smart repair decisions and safeguarding vehicle value.
The Changing Face of Car Body Materials
Over the past decade, car manufacturers have shifted from heavy steel panels to lighter, stronger materials. Today, aluminum, composites, and advanced high-strength steel are standard in many vehicles. Each material brings unique repair needs. For example, aluminum is more prone to stretching and requires gentle reshaping, while composites can crack and need specialized adhesives. These shifts mean car body repair is no longer a one-size-fits-all process.
Technology’s Role in Repair Complexity
Modern vehicles are packed with sensors, cameras, and advanced driver assistance systems (ADAS). Even a minor bumper scuff can affect parking sensors or disrupt lane-keeping features. Electric vehicles (EVs) add complexity with high-voltage systems and unique underbody structures. This technology boom means car body repair must be precise and cautious. Accidentally damaging a sensor or wire can lead to costly fixes.
The Economics of Modern Car Body Repair
Professional car body repair costs have soared in recent years. According to Car Repair Costs Are on the Rise, factors like labor shortages, expensive parts, and intricate electronics are driving up prices. The average bill for a minor dent or paint chip can be several hundred dollars. As a result, more drivers are turning to DIY solutions and repair kits, which offer significant savings and greater control over the process.
Safety in the Age of Advanced Vehicles
With new materials and electronics, safety is a top priority. When working on car body repair, you must use the correct tools to avoid further damage. Handling high-voltage components in EVs requires extra caution. Even simple tasks like sanding or painting need proper ventilation, gloves, and eye protection. Understanding a vehicle’s construction can prevent accidental harm to yourself or your car.
Why DIY Car Body Repair Skills Matter in 2025
Common car body damage in 2025 includes door dings, hail dents, bumper scuffs, and paint chips. Quick, effective repairs help maintain your car’s appearance and resale value. With the rise of affordable DIY kits and online resources, learning car body repair is more accessible than ever. Statistics show a steady growth in DIY kit sales, reflecting this trend. Mastering these skills puts you in control, saves money, and helps your vehicle stand out in a competitive market.
7 Essential Car Body Repair Hacks for 2025
Ready to take control of your car body repair needs in 2025? With modern materials, advanced tools, and a bit of insider knowledge, you can tackle common car issues at home. Below, discover seven essential car body repair hacks—each designed to help you save money, restore your vehicle’s beauty, and protect its value.
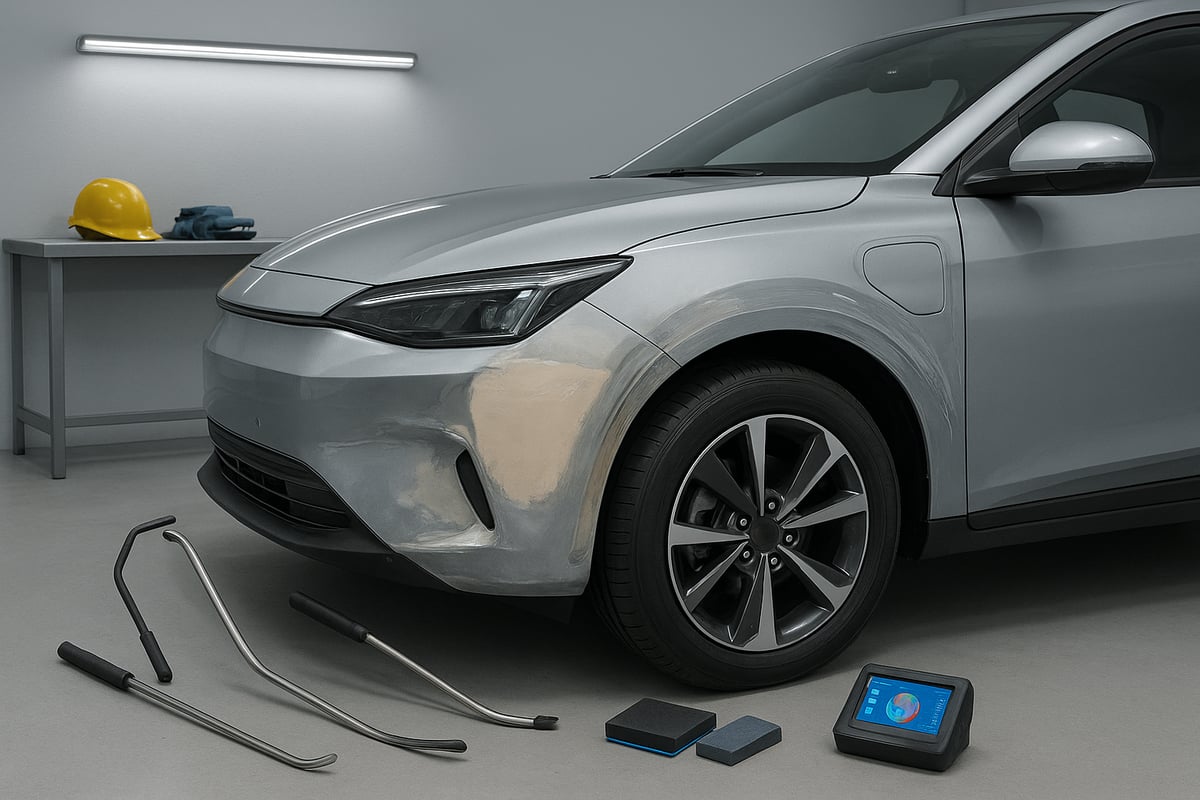
1. Mastering Paintless Dent Removal (PDR) Techniques
Paintless dent removal (PDR) is now the go-to car body repair solution for minor dents. This technique lets you fix common dents without repainting, preserving your car’s original finish. PDR is ideal for shallow dents from hail, shopping carts, or door dings—especially when the paint is intact.
In 2025, PDR tools are more accessible than ever. You can find complete kits with PDR rods, glue pullers, and tap-down sets at most auto retailers. These kits are designed for home use, making car body repair less intimidating.
Step-by-step PDR process:
- Identify the dent and ensure the paint is not cracked.
- Use specialized lighting to highlight the dent’s edges.
- Access the dent’s backside or use glue pullers on the exterior.
- Gently apply pressure with PDR rods, working slowly to massage the metal.
- Alternate between pushing and tapping down high spots for a smooth finish.
Patience is key. Rushing can stretch the metal or make the dent worse. Most car owners report saving $150 to $500 per dent with DIY PDR compared to shop prices. Avoid common mistakes like over-pushing or attempting PDR on sharp creases.
Want a detailed guide? Check out this Car Dent Repair Guide for step-by-step tips and videos to perfect your car body repair technique.
2. Flawless Scratch and Paint Chip Repair
Scratches and paint chips are among the most common car body repair challenges. First, assess the scratch depth: if your fingernail catches, it’s likely deeper and may need filler, while surface scratches can often be buffed out.
Modern repair kits in 2025 include touch-up pens, color-matched spray kits, and smart repair systems. Here’s how to tackle them:
- Clean the area thoroughly.
- Use fine sandpaper to smooth rough edges.
- For chips, apply primer if bare metal is exposed.
- Use a touch-up pen or spray kit, following the manufacturer’s instructions.
- Blend the edges with the surrounding paint.
- Finish with a clear coat for protection and shine.
Color-matching has never been easier. Use your car’s manufacturer code or digital apps to find a perfect match. Quick repairs prevent rust and keep your car body repair efforts effective. Many DIYers share impressive before-and-after results, with small chips vanishing after a careful touch-up.
3. DIY Bumper and Plastic Trim Restoration
Bumpers and trim take a beating, but you don’t always need a shop for car body repair. Typical damage includes scuffs, scratches, cracks, or faded plastics. In 2025, plastic welding kits and advanced adhesives make repairs easier and more durable.
DIY Bumper Repair Steps:
- Clean the damaged area.
- Sand smooth with fine-grit paper.
- For cracks, use a plastic welding kit or two-part adhesive.
- Fill deep gouges with a flexible filler.
- Sand again, then apply primer and matching paint.
- Restore faded trim with a heat gun or specialized trim restorer.
Eco-friendly and UV-resistant products are now common, helping your car body repair last longer. DIY bumper repair can cost under $50, while professional repairs may exceed $400. Always wear gloves and ventilate your workspace when working with adhesives or heat tools.
Some severe damage, like large cracks or broken mounting tabs, may require professional help.
4. Professional-Grade Sanding and Surface Prep Made Easy
Proper surface prep is the foundation of any successful car body repair. Skipping this step leads to poor paint adhesion and visible flaws. In 2025, both manual sanding blocks and power sanders are widely available for home use.
Recommended sanding grits:
| Repair Stage | Grit Range |
|---|---|
| Paint removal | 80–120 |
| Filler shaping | 180–220 |
| Primer smoothing | 320–400 |
| Pre-paint finish | 600–800 |
Step-by-step prep:
- Feather paint edges so they blend with undamaged areas.
- Smooth filler and primer with progressive sanding.
- Wipe down panels with a tack cloth before painting.
Always use a respirator and keep your area ventilated. Dust-free surfaces mean cleaner, longer-lasting car body repair. Power sanders can save time, but manual sanding offers more control for delicate spots. Avoid swirl marks by sanding in even, overlapping motions.
5. Seamless DIY Spray Painting and Blending Techniques
Spray painting is the most visible part of car body repair, and modern tools make it easier for DIYers. You can choose between HVLP sprayers, compressors, or high-tech aerosol kits designed for automotive finishes.
DIY Spray Painting Steps:
- Mask off adjacent panels and trim.
- Apply primer and let it dry.
- Spray color in light, even coats, holding the nozzle 6–8 inches from the surface.
- Blend new paint into existing areas for a seamless look.
- Finish with a clear coat for added durability.
Digital color-matching tools in 2025 help ensure your car body repair is invisible. Drying and curing times may vary, so check product instructions. Compared to professional paint jobs, DIY repairs can cost under $100, saving hundreds of dollars.
Work in a well-ventilated area and wear a respirator. Proper prep and patience are essential for a factory-like finish.
6. Quick Glass Chip and Crack Repair at Home
Windshield chips and short cracks are common but can often be fixed at home with modern resin-based kits. These kits use UV curing technology for fast, strong repairs—making them a must-have in your car body repair arsenal.
DIY Glass Repair Process:
- Clean the damaged area with glass cleaner.
- Position the resin applicator over the chip or crack.
- Inject resin and let it fill the void.
- Cure the resin with a UV lamp or sunlight.
- Remove excess resin and polish the surface.
Most chips under a quarter in size are suitable for home repair. DIY kits typically cost $15–$50, compared to $100 or more at a shop. If the damage is in the driver’s direct line of sight or is longer than a dollar bill, seek professional help.
Prevent further spreading by repairing chips promptly and avoiding temperature extremes.
7. Long-Lasting Paint Protection Films and Coatings
Protecting your paint is the final car body repair hack for 2025. Paint protection films (PPF) and ceramic coatings have become more affordable and user-friendly for DIYers.
DIY PPF & Coating Steps:
- Wash and decontaminate the paint.
- Carefully apply PPF to vulnerable areas (hood, bumpers, mirrors).
- Use a squeegee to remove bubbles.
- For ceramic coatings, apply with a microfiber applicator and buff off residue.
Benefits of these products include resistance to chips, UV rays, and environmental fallout. New self-healing and hydrophobic technologies keep your vehicle looking new. DIY kits can last 2–5 years, while professional applications may offer longer protection.
Maintain your protected surfaces with gentle washing and periodic inspections. Reapply coatings as needed to preserve your car body repair results.
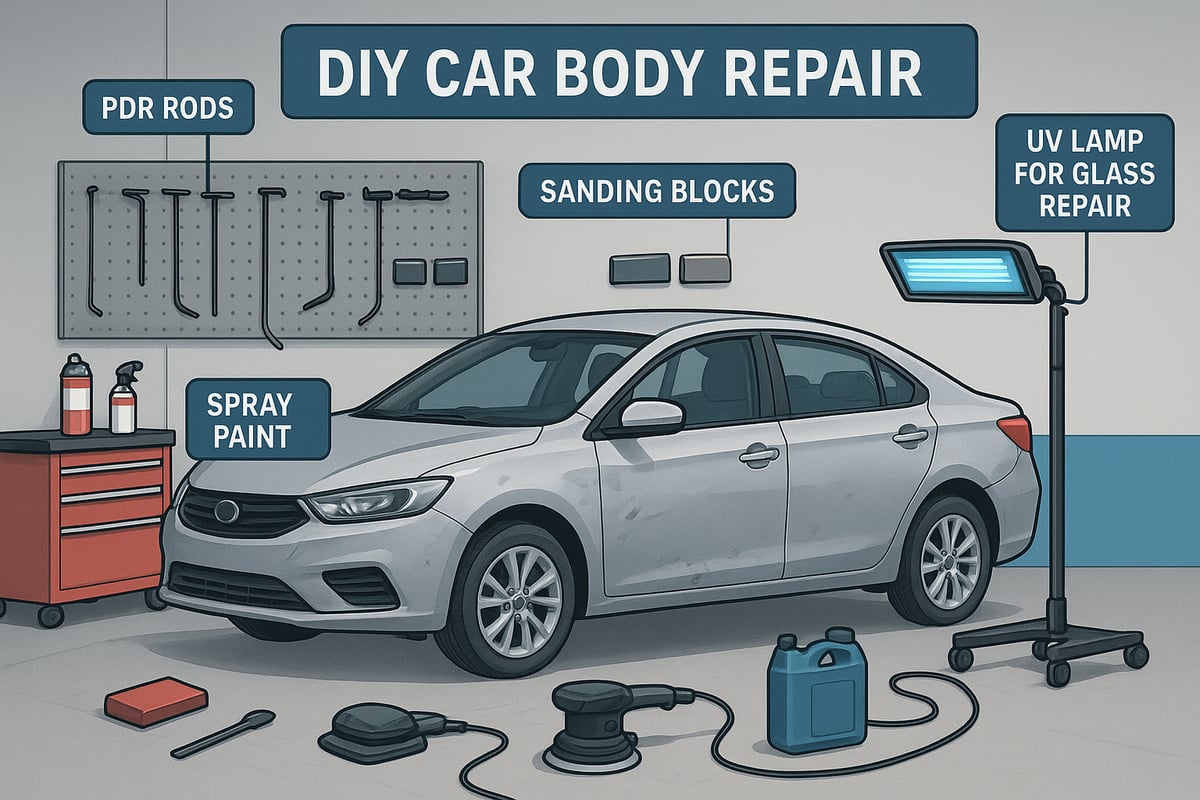
Essential Tools and Equipment for DIY Car Body Repair
Having the right tools and equipment is the foundation of any successful car body repair project. In 2025, modern vehicles demand precision, quality, and the right approach. Whether you are a beginner or an experienced DIY enthusiast, understanding tool selection and maintenance is key to achieving professional-level results and protecting your investment.
Choosing the Right Tools for the Job
Starting your car body repair journey means equipping yourself with the essentials. For beginners, a solid toolkit typically includes sanding blocks, paint sprayers, PDR kits, and trim removal tools. Each tool plays a unique role, from smoothing surfaces to popping out dents or carefully removing panels without damage.
Quality matters for every car body repair. Investing in well-made tools ensures consistent performance and greater safety. In 2025, multi-purpose tools are making waves, offering interchangeable heads and digital features for various repair tasks.
How do manual and power tools stack up? Here is a quick comparison:
| Tool Type | Pros | Cons | Best For |
|---|---|---|---|
| Manual | Affordable, precise | Requires more effort | Small repairs, detailing |
| Power | Fast, efficient | Higher cost, needs power | Large areas, sanding |
User reviews and recent studies show that quality tools last longer and deliver better results. For more details on specific tool recommendations, check out the Panel Beater’s Essential Tools guide. Building a cost-effective kit is possible by prioritizing essentials and expanding as you gain experience.
Professional-Grade Tools from KGM Equipment
For those looking to elevate their car body repair game, KGM Equipment stands out as a leading supplier. Their lineup features frame machines, dent pullers, spot welders, and specialized tools designed for both home garages and small auto shops.
What sets KGM Equipment apart? It is their commitment to quality, reliability, and expert customer support. Whether you are a DIYer seeking professional results or a vocational student learning the trade, their tools help you achieve precise and lasting repairs.
Online shopping at KGM Equipment is straightforward, with financing options available for larger purchases. If you want to understand how top-tier tools can transform your car body repair projects, their Auto Body Work and Repair resource offers valuable insights and tips. Small shops and enthusiasts alike benefit from access to pro-grade equipment and industry knowledge.
Tool Maintenance and Safety Tips
Maintaining your car body repair tools is just as important as choosing the right ones. Clean tools after each use and inspect them regularly for wear or damage. Store them in a dry, organized space to prolong their lifespan.
Safety is paramount in car body repair. Always use PPE like gloves, goggles, and respirators, especially when sanding, painting, or handling chemicals. Handle paints, adhesives, and solvents with care, following manufacturer guidelines.
If a tool malfunctions, consult the manufacturer or a trusted repair resource before attempting a fix. Well-maintained tools and safe habits ensure every car body repair project runs smoothly and safely.
Pro Tips for a Flawless Finish and Lasting Results
Achieving a flawless result in car body repair is about more than just following steps. Even small details can make the difference between a professional look and a patchy fix. By learning from expert insights, you can maximize the value of your effort and keep your car looking its best.
Avoiding Common DIY Mistakes
Many car body repair projects fail due to avoidable mistakes. Rushing prep work, skipping masking, or improper sanding can leave visible marks or even cause rust. For example, using the wrong grit sandpaper may create swirl marks that stand out after painting.
Here’s a quick table of typical errors and their consequences:
| Mistake | Consequence | Solution |
|---|---|---|
| Poor surface prep | Paint peeling | Clean and sand thoroughly |
| Mismatched paint | Obvious repairs | Use manufacturer codes or apps |
| Incomplete masking | Overspray | Mask all nearby surfaces |
| Skipping primer | Poor adhesion | Always apply primer |
To avoid these pitfalls, create a detailed checklist for each car body repair stage. Take your time, double-check color matches, and always inspect your progress under good lighting. These habits will help you achieve a consistent, professional finish.
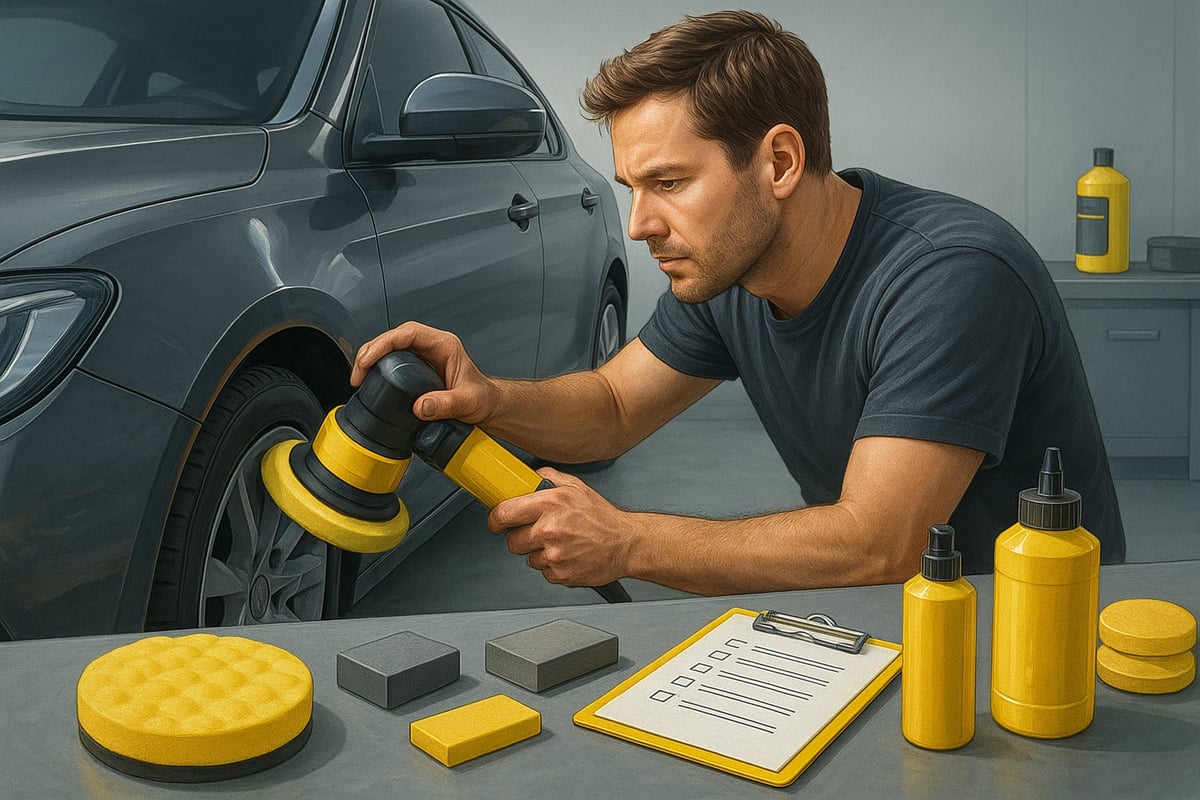
Advanced Detailing and Finishing Touches
The secret to a like-new car body repair is in the details. After paint cures, buffing and polishing remove surface imperfections and blend the repair seamlessly with the rest of the car. Use a dual-action polisher with finishing compounds to achieve a deep, glossy shine.
Apply a glaze to fill micro-scratches and enhance reflection. For the best results, inspect the work from different angles and under various lighting conditions. Touch up any minor flaws with a fine brush or pen.
After repairs, a thorough wash and wax not only protect the finish but also reveal any missed spots. This routine ensures your car body repair stands out, looking as smooth as a professional job.
When to Call a Professional
Some car body repair challenges are best left to experts. If you encounter structural damage, advanced electronics, or severe rust, DIY fixes might not be safe or effective. Attempting complex repairs without the right skills or equipment can lead to higher costs or safety risks.
When in doubt, research trusted local shops and read reviews. According to Car repair statistics 2025, professional intervention is often necessary for advanced bodywork or where precision is critical.
Knowing your limits is a key part of responsible car body repair. This way, you protect both your investment and your safety.
Now that you know the 7 essential car body repair hacks for 2025, you’re ready to tackle repairs with confidence and protect your vehicle’s value. The right tools make all the difference—whether you’re smoothing out dents, fixing scratches, or restoring trim, quality equipment means better results and less frustration. That’s why I always recommend investing in reliable gear from trusted suppliers. If you’re ready to take your DIY repairs to the next level or want to see what’s available for your next project, Shop Now for professional-grade tools and expert support. Your car—and your wallet—will thank you.